
How to DIY an AV Rack Plan for a Home Theater?
Are you tired of the unsightly tangle of cables and haphazardly stacked components that make up your home theater setup? Fear not, fellow AV enthusiasts! In this comprehensive guide, we’ll walk you through the process of creating your DIY home theater AV rack. Not only will this project help you achieve a clean, organized look, but it will also improve the functionality and longevity of your equipment.
Key Takeaways
- A well-designed DIY rack maximizes space and keeps your components organized, making your home theater rack setup neat and efficient.
- DIY racks allow easy access for wiring, troubleshooting, and future upgrades, ensuring that your setup can evolve with new technology.
- Proper ventilation is crucial for the longevity and performance of your equipment. DIY racks can be designed with airflow in mind, incorporating fans or vented shelves.
- A DIY rack offers a clean and organized way to route cables, reducing clutter and simplifying troubleshooting.
- Building your own rack can save money compared to pre-built solutions, allowing for a customized design that meets your specific needs and preferences.
Why DIY a Home Theater AV Rack Building?
There are several compelling reasons to consider a DIY approach when building an home theater AV rack for your home theater setup:
- Space Optimization: As you accumulate more home theater components like gaming consoles, streaming devices, and multiple AV receivers, you’ll quickly realize the need for a dedicated space to house all this equipment. A well-designed DIY rack maximizes space and keeps your components organized.
- Serviceability: Commercial-grade equipment racks are designed with serviceability in mind. They make accessing the back of your components easy for wiring, troubleshooting, and upgrades, a significant advantage over stacking components on shelves or AV rack cabinets.
- Upgradability: As you upgrade your home theater over time, a rack system lets you easily swap out components without disrupting the entire setup. This future-proofing aspect of racks is invaluable for enthusiasts who like to keep their systems up-to-date.
- Airflow and Cooling: Proper ventilation is crucial for the longevity and performance of your AV equipment. Racks are designed with airflow in mind, often incorporating fans or vented shelves to keep components cool.
- Cable Management: Racks provide a clean, organized way to route cables from your components to the appropriate inputs and outputs. This helps reduce clutter and makes troubleshooting easier down the line.
By taking a DIY approach, you can customize your rack to fit your specific needs, save money compared to buying a pre-built solution, and take pride in creating a professional-looking setup for your home theater.
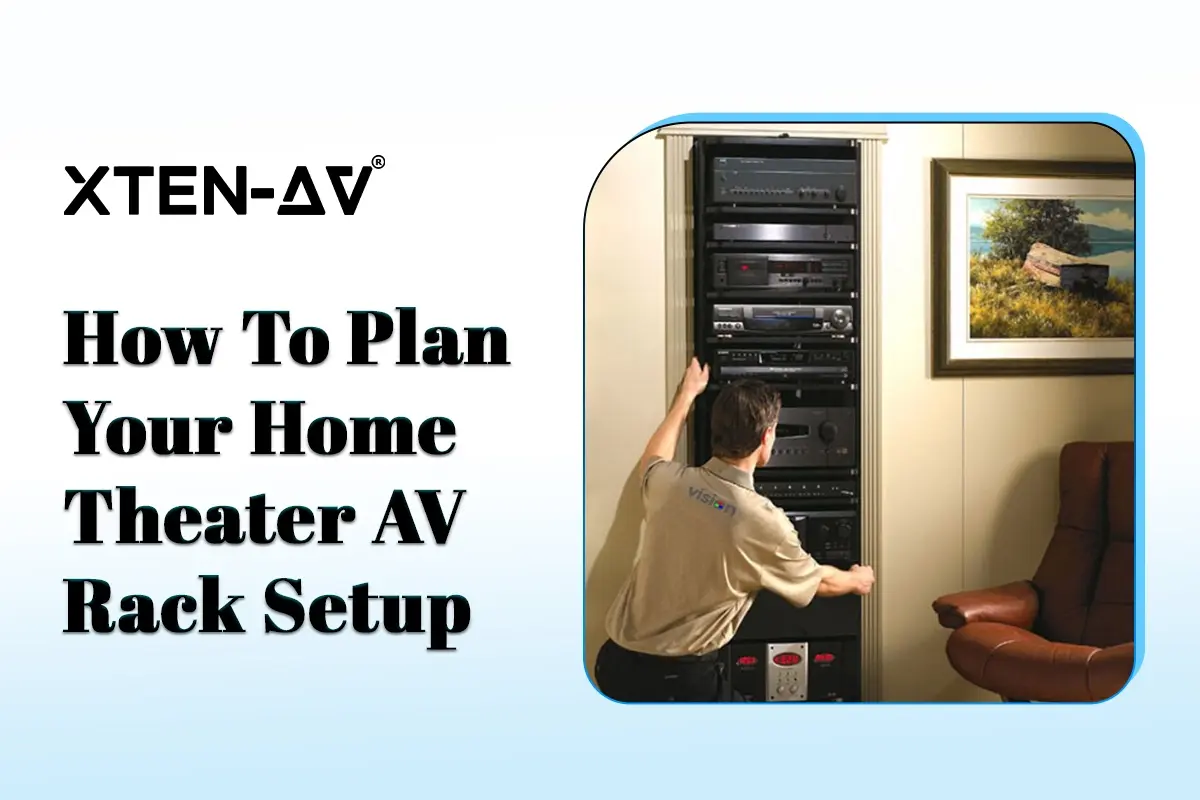
How To Plan Your Home Theater AV Rack Setup?
Planning your AV receiver rack is critical in ensuring that your home theater AV rack setup is functional and aesthetically pleasing. Here are key considerations to keep in mind:
Equipment Inventory
Before building your rack, create a comprehensive inventory of all components you plan to include. This list should encompass:
- AV Receivers
- Gaming Consoles
- Streaming Devices
- Blu-ray Players
- Sound Systems
- Media Players
Note the dimensions (height, width, depth) and weight of each component. This information is vital for ensuring that your rack can support the weight of your equipment and that each component fits comfortably within the designated space.
Understanding Rack Units (U)
Rack units (U) are a standard measurement used to describe the height of equipment racks. One rack unit is equivalent to 1.75 inches in height. To determine how many rack units you need:
- Measure the Height: Add the heights of all your components.
- Calculate Total Rack Units: Divide the total height by 1.75 to find out how many rack units you will require.
For example, if your AV receiver is 3.5 inches tall, it occupies 2U of space.
Still confused about the rack depth and height. Checkout our detailed blog that highlights the ideal AV rack dimensions.
Future Expansion Considerations
When designing your rack, it’s essential to think about future expansion. Consider the following:
- Additional Equipment: Anticipate future purchases, such as new gaming consoles or streaming devices, and ensure your rack has enough space to accommodate them.
- Ventilation Space: Proper airflow is crucial for preventing overheating. Leave extra space between components, or include shelves designed for ventilation to ensure that your equipment remains cool and operates efficiently.
By carefully planning your home theater av rack with an accurate inventory, understanding rack units, and considering future expansions, you can create a versatile and efficient home theater AV rack setup that meets your needs today and in the future.
Let’s Get Started With Building The Rack
Creating a DIY AV receiver rack involves selecting the right materials and tools and designing an effective layout. Here’s how to get started:
Materials Needed
Choosing the right materials is crucial for durability and aesthetics when building your home theater av rack. Here’s a list of recommended materials and tools:
Materials:
- Wood: Plywood or MDF (medium-density fiberboard) is ideal for a sturdy yet lightweight structure. Choose a thickness of at least ¾ inch for stability.
- Metal: Consider using metal brackets or a pre-fabricated metal frame for a more industrial look.
- Screws: Use wood screws for wooden racks and metal screws for metal components. Ensure they are long enough to provide a secure hold.
- Paint or Stain: To finish your rack, select a paint or stain that matches your home décor.
- Vents or Fans: Incorporate ventilation solutions to prevent overheating of your equipment.
Tools:
- Saw: A circular saw or table saw for cutting wood to the desired dimensions.
- Drill: A power drill for making holes and driving screws.
- Screwdriver: For tightening screws and assembling components.
- Measuring Tape: To ensure accurate measurements for all pieces.
- Level: To make sure your rack is even and stable.
- Sandpaper: This is used to smooth edges and surfaces after cutting.
Designing the Layout
Once you have your materials ready, it’s time to design your rack layout. Using a spreadsheet can be an effective way to visualize your setup:
- Create a Grid: Open a spreadsheet application (like Excel or Google Sheets) and create a grid that represents the dimensions of your rack. Each cell can represent a specific measurement (e.g., 1U = 1.75 inches).
- Input Component Dimensions: Enter the dimensions of each component into the grid. This will help you see how they fit together and identify any potential spacing issues.
- Organize by Function: Arrange your components based on their function. For example, place your AV receiver at the top for easy access, followed by gaming consoles and streaming devices. This organization not only enhances accessibility but also improves airflow.
- Adjust as Needed: Use the spreadsheet to experiment with different configurations. This flexibility allows you to optimize your layout before cutting or assembling.
You can create a functional and visually appealing AV receiver rack that meets all your home theater needs by carefully selecting your materials and thoughtfully designing your layout using a spreadsheet.
Next Up Is Wiring Your Components
Proper wiring is essential for the smooth operation of your home theater system. Here are some tips to help you manage your cables effectively:
Cable Management Tips
To ensure optimal performance and minimize interference, it’s crucial to separate power/control cables from signal cables:
- Power/Control Cables include power cords and control cables like HDMI, RCA, and speaker wires. Keep them bundled together and routed separately from signal cables.
- Signal Cables: These carry audio and video signals between components. Avoid running them parallel to power/control cables, as this can cause interference and signal degradation.
- Cable Slack: Leave some slack in your cables to allow for future adjustments and serviceability. This extra length will come in handy if you need to move or replace a component.
Checkout our detailed guide on cable management tips that will ease your struggles.
Color Coding
Color coding your av cables is an effective way to keep your wiring organized and easy to identify:
- Assign Colors: Assign specific colors to each cable type (e.g., red for HDMI, blue for RCA, green for speaker wires).
- Label Ends: Use colored electrical tape or cable labels to mark the ends of each cable with its corresponding color.
- Create a Legend: Keep a legend that maps each color to its cable type. This will make it easier to troubleshoot issues and make changes in the future.
Pro Tips for Wiring
To further enhance your cable management, consider using wire ties and velcro strips:
- Wire Ties: Use zip or reusable velcro ties to bundle cables together. This keeps them neat and prevents tangling.
- Velcro Strips: Attach velcro strips to the back of your rack and use them to secure bundled cables. This allows for easy adjustments and prevents cables from sagging.
- Cable Trays: Install cable trays or raceways at the back of your rack to route cables in an organized manner. These trays provide a clean and professional look.
By separating cables, color-coding them, and using wire ties and Velcro strips, you can create a tidy and efficient wiring setup for your home theater system. Remember to plan your cable routing before assembling your rack to ensure a smooth installation process.
Future Service and Maintenance
Designing your AV receiver rack for easy access to components and wiring is essential for ensuring long-term functionality and serviceability. Here’s why it matters and how to maintain your setup effectively:
Importance of Easy Access
- Efficient Troubleshooting: An accessible rack allows for quick identification of issues. Easy access minimizes downtime and frustration if a component fails or requires adjustment.
- Simplified Upgrades: As technology evolves, you may want to upgrade or replace components. A well-designed rack facilitates this process, allowing you to swap out devices without significant disassembly.
- Cable Management: Proper access to wiring means you can manage cables more effectively. This reduces clutter and helps prevent interference between power and signal cables, ensuring optimal performance.
Tips for Maintaining and Troubleshooting
- Regular Inspections: Schedule routine checks to ensure all components are functioning correctly. Look for loose connections, frayed cables, or overheating equipment.
- Keep Documentation Handy: Maintain a log of your equipment, including specifications and installation details. This documentation will be invaluable for troubleshooting and future upgrades.
- Label Everything: Clearly label all cables and components. This practice simplifies maintenance and helps you quickly identify issues or make modifications.
- Utilize Cable Management Tools: Keep wiring organized with cable ties, Velcro strips, and cable trays. This improves airflow and makes it easier to spot potential problems.
- Plan for Expansion: When designing your rack, consider future additions. Leaving extra space and ensuring easy access to all areas will make incorporating new devices simpler.
By prioritizing easy access and implementing a solid equipment maintenance routine, you can ensure that your AV receiver rack remains functional and efficient for years. This proactive approach not only enhances performance but also extends the lifespan of your equipment.
How does XTEN-AV’s Automated Rack Layout Tool Help?
To streamline your home theater AV rack design process, look no further than XTEN-AV’s innovative automated rack layout feature. This cutting-edge av rack diagram builder makes your life easier by allowing you to create professional-grade rack layouts with just a few clicks.
Effortless Creation
Imagine generating your entire rack layout with a simple click of the “generate” button. XTEN-AV makes this a reality! No more tedious manual measurements or complicated calculations just enter your components and let the software do the heavy lifting. This feature saves time and ensures that your layout is optimized for both functionality and aesthetics.
Customization at Your Fingertips
The fun doesn’t stop there once you’ve generated your automated rack layout. XTEN-AV allows you to customize and edit the generated layouts to suit your needs. Want to rearrange components for better accessibility? Need to add ventilation spaces or adjust cable management? With XTEN-AV, you can make those changes effortlessly, ensuring your rack is tailored perfectly to your home theater setup.
Whether you’re a DIY enthusiast or a professional AV designer, XTEN-AV’s automated rack layout feature is a game-changer. It combines efficiency with customization, allowing you to focus on what matters enjoying your home theater experience. So why wait? Dive into the world of automated design and elevate your AV rack setup today Book a demo session or explore our free trial!

AV Design Mastery + Winning Proposals = 10x Productivity!
- Automatic Cable Labeling & Styling
- 100+ Free Proposal Templates
- Upload & Create Floor Plans
- 1.5M Products from 5200 Brands
- AI-powered ‘Search Sense'
- Legally Binding Digital Signatures
No Credit Card Required
Conclusion
Well, there you have everything you need to know to create your DIY AV receiver rack! From planning your layout to wiring your components and even exploring automated design tools, you’re now equipped with the knowledge to transform your home theater setup.
Remember, the beauty of a DIY project lies in the ability to customize it to your heart’s content. Don’t be afraid to get creative and put your spin on things. You might even develop a groundbreaking new cable management technique or a sleek, modern design that puts IKEA to shame.
So, what are you waiting for? Dive in, get dirty, and share your experiences with the community. Post pictures of your finished rack, swap tips, and tricks, and inspire others to take on this exciting project. Together, we can elevate the home theater world one DIY rack at a time!
Frequently Asked Questions
Plywood or MDF are the best materials for a DIY AV receiver rack, both for durability and aesthetics. Metal brackets can enhance stability. Choose materials that support weight and allow for ventilation to prevent overheating, ensuring your equipment remains safe and functional.
To manage cables effectively, separate power/control cables from signal cables to minimize interference. Use color coding for easy identification and employ cable ties or velcro strips to keep cables organized. Installing cable trays can further enhance organization and airflow, ensuring a clean setup.
Consider leaving extra space in your rack design for additional components when planning for future expansions. Ensure easy access to all devices for upgrades and maintenance. Incorporate ventilation solutions to accommodate new equipment, preventing overheating and ensuring optimal performance over time.